Best Well Pump Pressure Switch Buying Guide (2026): 30/50 vs 40/60 PSI
A well pump pressure switch automatically starts and stops the water pump according to system pressure. When pressure falls to the cut-in setting, the switch starts the pump. When pressure reaches the cut-out setting, it stops the pump.
Choosing the wrong pressure switch can cause weak water pressure, frequent cycling, continuous pump operation, damaged contacts, or premature motor failure.
This well pump pressure switch buying guide explains how to compare 30/50 and 40/60 PSI settings, check electrical compatibility, recognize common failures, and avoid confusing a mechanical pressure switch with an Automatic Pump Controller.
Quick Answer
For most residential Jet Pump and pressure tank systems, choose a quality mechanical pressure switch that matches the existing system.
- Match the cut-in and cut-out pressure.
- Confirm voltage, electrical rating, and supported motor horsepower.
- Check the pressure connection size and thread.
- Do not assume 40/60 PSI is automatically better than 30/50 PSI.
Why You Can Trust ToollQ
This guide combines manufacturer information with 15 years of plumbing and hardware industry experience, including helping customers diagnose Jet Pumps, pressure tanks, and mechanical pressure switches.
Common customer complaints include pumps that will not start, pumps that will not stop, rapid cycling, burned contacts, clogged pressure ports, leaking connections, and replacement switches with the wrong pressure or electrical rating.
ToollQ Expert Insight
Do not replace a pressure switch until you confirm the system can build pressure. A pump, suction leak, Foot Valve, pressure tank, or plumbing leak can create symptoms that look like a failed switch.
Before You Buy
Collect the following information before choosing a replacement pressure switch.
- Existing setting: 20/40, 30/50, or 40/60 PSI
- Pump information: Model, horsepower, voltage, and current
- Pump capability: Maximum pressure or total head
- Pressure tank: Condition and precharge setting
- Connection: Port size and thread type
- Original performance: Whether the old system previously worked correctly
If the original system operated correctly, replacing the switch with the same pressure setting is usually the simplest starting point. Changing the pressure range requires checking the entire system.
How a Well Pump Pressure Switch Works
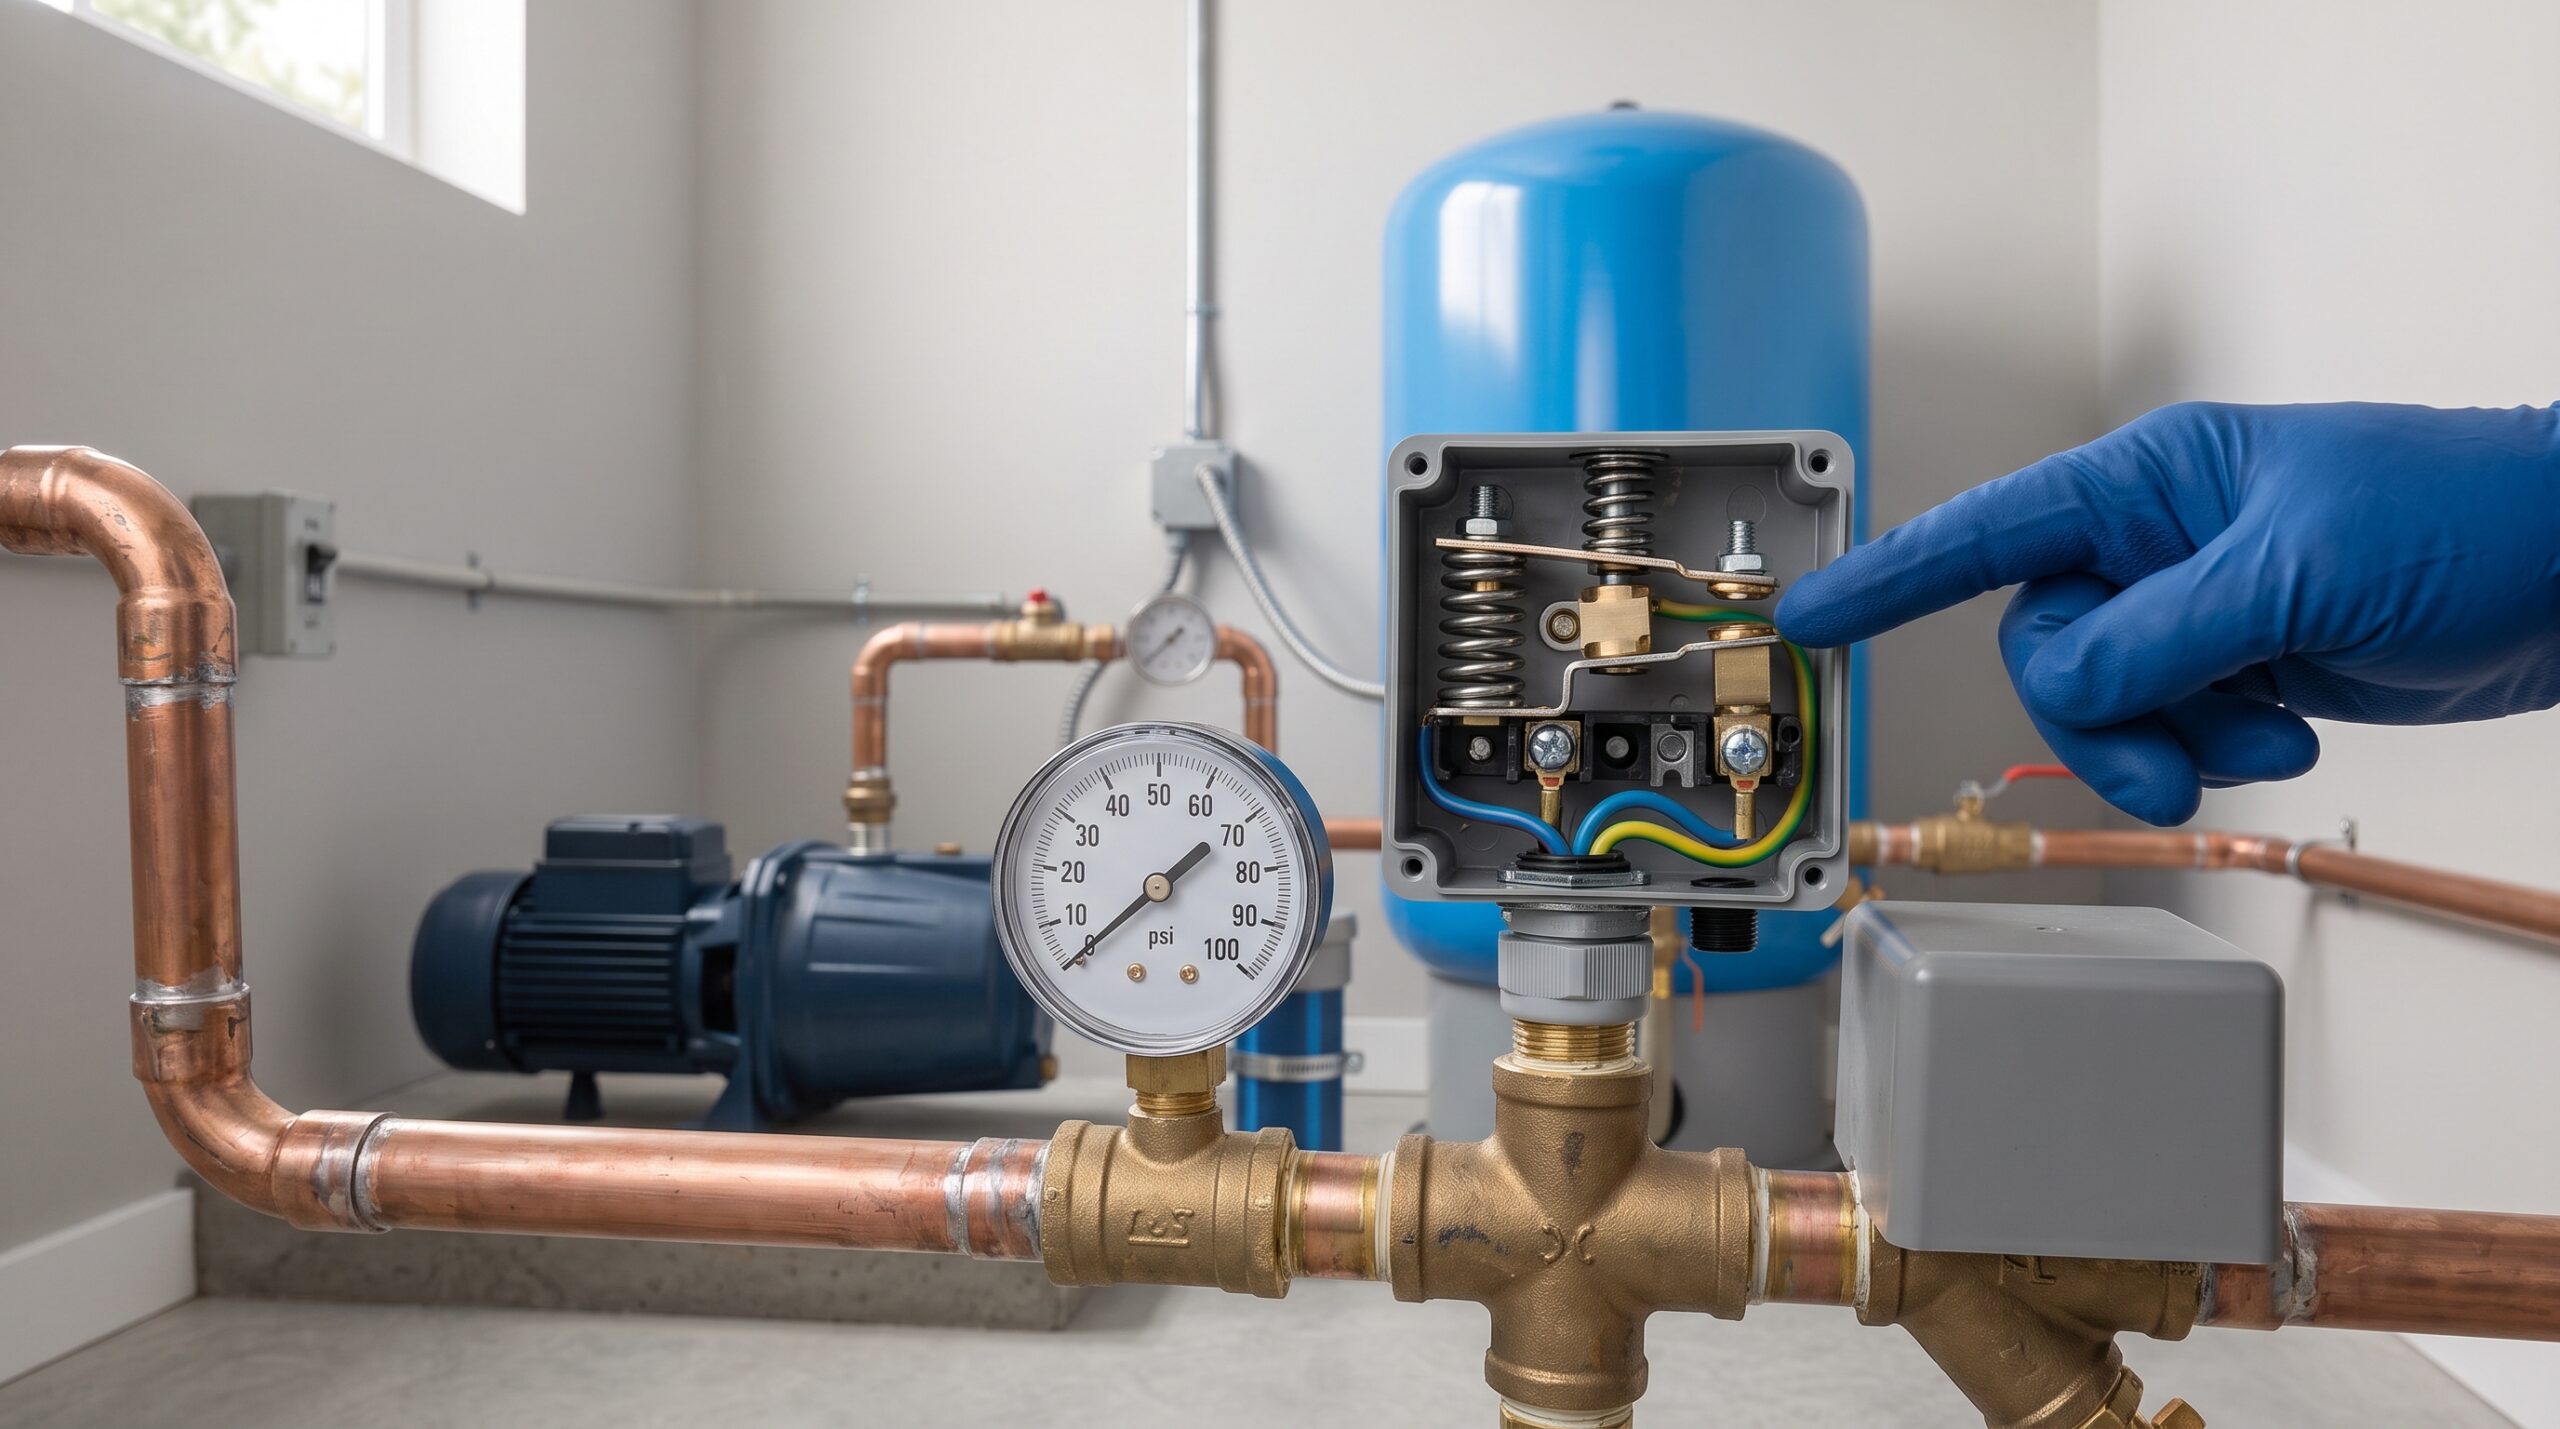
A mechanical pressure switch senses water pressure through a small port connected to the pump or pressure tank system. Internal springs and a diaphragm operate electrical contacts that control the pump motor.
- Household water use lowers system pressure.
- The contacts close at the cut-in pressure and start the pump.
- The pump refills the pressure tank and raises system pressure.
- The contacts open at the cut-out pressure and stop the pump.
For example, a 30/50 switch starts the pump at approximately 30 PSI and stops it at approximately 50 PSI. Actual operating pressure should be confirmed with an accurate pressure gauge.
30/50 vs 40/60 PSI
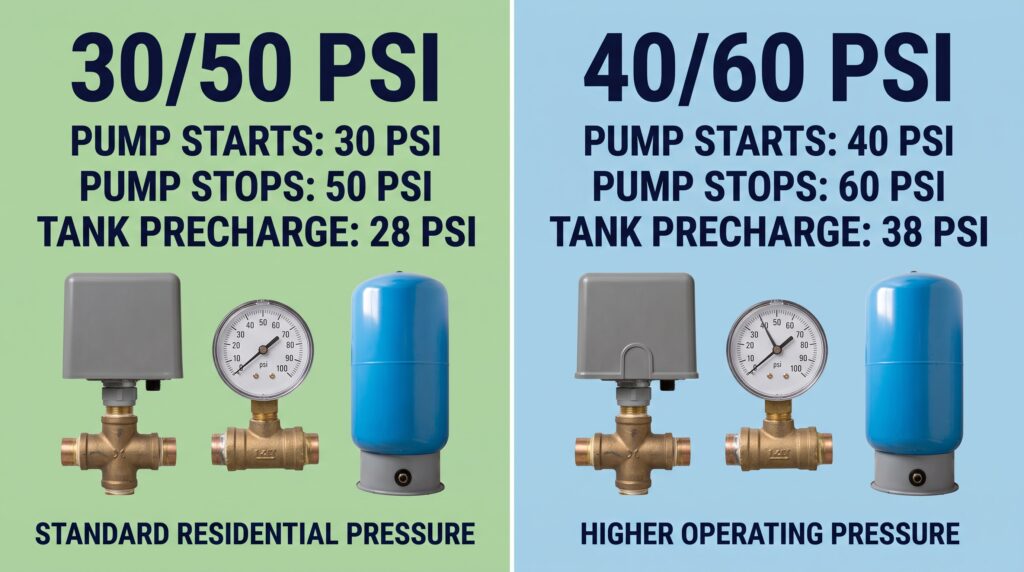
30/50 PSI
Cut-in: 30 PSI
Cut-out: 50 PSI
Typical tank precharge: 28 PSI
A 30/50 switch is a practical choice for many standard residential systems, older plumbing, or pumps with less available pressure.
40/60 PSI
Cut-in: 40 PSI
Cut-out: 60 PSI
Typical tank precharge: 38 PSI
A 40/60 switch provides higher operating pressure and may suit multi-story homes or users who want stronger fixture pressure. The pump must be able to reach the 60 PSI cut-out reliably.
Higher pressure also places more stress on pipes, Flexible Hoses, valves, fixtures, and the pressure tank. Confirm that every component is suitable before upgrading.
ToollQ Pro Tip
If a pump cannot reach 60 PSI, installing a 40/60 switch may cause it to run continuously. Do not select a switch only because its pressure numbers are higher.
Types of Pump Controls
Standard Mechanical Pressure Switch
This is the most straightforward choice for a conventional Jet Pump and pressure tank system. It starts and stops the pump at preset pressure points and is widely available in common residential settings.
Low-Pressure Cut-Off Switch
This mechanical switch adds protection when pressure falls abnormally below the normal cut-in point. It may help protect a pump during loss of prime, low well yield, or other low-pressure conditions.
Schneider Electric explains that its M4 low-pressure cut-off opens the contacts at 10 PSI below the set cut-in pressure. This type normally requires the user to understand the manual restart procedure. Check the instructions for the exact model.
Do not confuse a pressure switch with an Automatic Pump Controller.
An Automatic Pump Controller commonly uses both pressure and flow sensing and is often installed on automatic household booster pumps. It is not automatically compatible with a conventional Jet Pump and large pressure tank system.
How to Choose the Right Pressure Switch
1. Check Contact Quality
Pressure switch contacts repeatedly carry the pump’s starting and running current. Look for a reputable product with solid contacts, stable mechanical operation, and a protective cover.
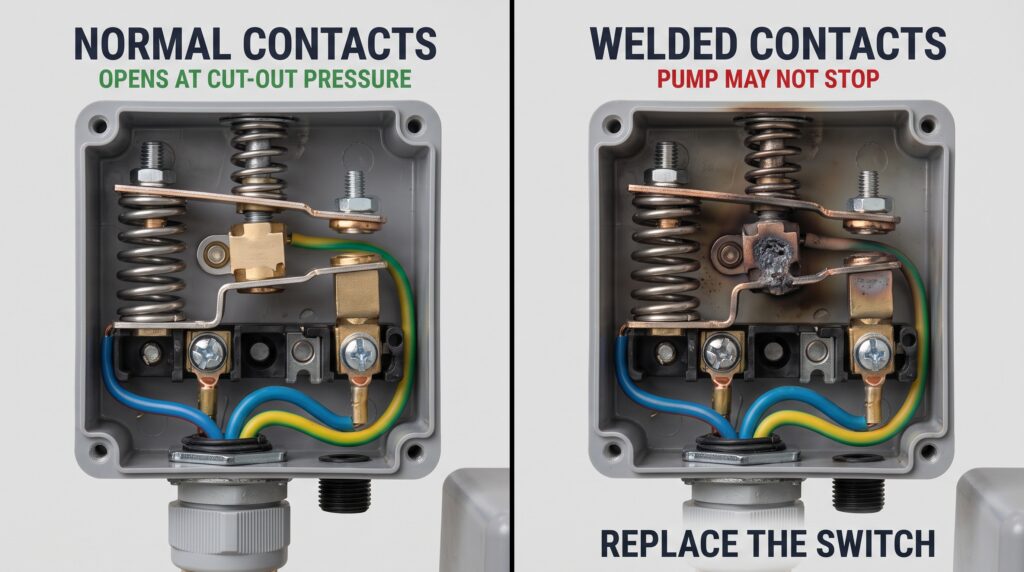
Thin or poor-quality contacts may overheat, pit, arc, or weld together more quickly.
2. Match Voltage and Electrical Rating
Confirm whether the pump operates on 115V or 230V and compare its electrical requirements with the switch rating. Do not assume every residential switch can safely control every pump motor.
Larger motors may require a properly rated switch, control box, relay, or motor starter. Follow the pump and switch manufacturers’ wiring requirements.
3. Check Supported Motor Horsepower
A pressure switch may have different horsepower ratings at different voltages. Match the exact rating printed on the product rather than choosing by physical size or appearance.
4. Select the Correct Pressure Range
Use the same 30/50 or 40/60 setting when replacing a switch on a system that previously worked correctly. Before changing pressure, verify pump capability, pressure tank precharge, plumbing condition, fixture ratings, and desired household pressure.
5. Verify the Connection
Many residential pressure switches use a small bottom pressure connection, but port size and thread type can vary. Confirm the old switch, tank tee, nipple, or pump connection before buying.
6. Consider Protection and Support
Check enclosure suitability, warranty, manufacturer support, and replacement availability. Install the switch in a dry, serviceable location unless the model is specifically rated for another environment.
Common Buying Mistakes and Hidden Costs
Choosing by PSI Alone
A switch may have the correct pressure range but the wrong voltage, current, horsepower rating, or connection. Electrical mismatch can overheat or damage the contacts.
Upgrading to 40/60 Without Checking the Pump
If the pump cannot reach the new cut-out pressure, it may run continuously, overheat, and eventually fail.
Forgetting the Pressure Tank Precharge
The tank precharge is commonly set 2 PSI below the pressure switch cut-in. It must be checked with the pump disconnected and the tank fully drained to 0 PSI.
Replacing the Switch Without Diagnosing the System
A clogged pressure port, leaking pipe, failed pressure tank, worn pump, suction leak, low well level, or faulty Foot Valve may prevent normal operation. Replacing the switch will not correct these problems.
Adjusting the Springs by Guesswork
Incorrect adjustment can create unsafe pressure, poor water performance, rapid cycling, or continuous pump operation. Use an accurate gauge and follow the exact manufacturer procedure.
Buying the Lowest-Priced Switch
A low initial price can lead to burned contacts, repeat labor, another replacement, pump damage, or leaks caused by incorrect pressure.
Real Customer Experience
System: Shallow well → Jet Pump → Pressure tank → Whole house
Symptom: The pump continued running after every faucet was closed. The homeowner had to turn off the circuit breaker to stop it.
Inspection: After safely disconnecting the power, the pressure switch contacts were found burned and welded together.
Solution: The complete pressure switch was replaced with a compatible model.
Result: The pump stopped automatically when the system reached its cut-out pressure.
This case shows why a pump that will not stop must be treated seriously. Turn off the power and identify whether the problem is a welded switch or a system that cannot reach cut-out pressure.
Clean, Adjust, or Replace?
Inspect or Clean
A qualified person may clean a blocked pressure port, correct a leaking nipple, secure wiring to the specified torque, or inspect light contamination if the manufacturer permits it.
Adjust
Pressure settings may be adjustable, but the procedure varies by model. Adjust only with the correct pressure gauge, system information, and manufacturer instructions.
Replace
Replace the complete switch when contacts are badly burned, pitted, or welded; the inside is wet or heavily corroded; springs or mechanical parts are damaged; the diaphragm or connection leaks; or the electrical rating is unsuitable.
When several components are worn, complete replacement is generally more dependable than temporary repair.
Installation and Safety
A pressure switch combines electricity and pressurized water. Incorrect installation can cause electrical shock, equipment damage, fire, or excessive system pressure.
- Turn off the circuit breaker and verify that power is disconnected.
- Release system pressure before removing the switch.
- Record the original wiring positions before disconnecting wires.
- Confirm voltage, grounding, conductor size, and motor rating.
- Use suitable thread sealant without blocking the pressure port.
- Do not overtighten the pressure connection.
- Set the pressure tank precharge for the selected cut-in pressure.
- Test the actual cut-in and cut-out with an accurate pressure gauge.
- Reinstall the protective cover after testing.
If you are not trained to work with pump wiring and pressurized systems, use a qualified pump technician or electrician.
For model-specific information, see Schneider Electric’s pressure adjustment guidance, its explanation of the low-pressure cut-off option, and Amtrol’s well tank precharge guidance.
ToollQ’s Choice and Final Recommendation
For most residential Jet Pump and pressure tank systems, ToollQ recommends a quality mechanical pressure switch that matches the original system.
Prioritize contact quality, correct voltage and current rating, supported motor horsepower, pressure range, and connection size.
Use 30/50 for a standard system when appropriate. Choose 40/60 only when the pump, pressure tank, plumbing, and fixtures can safely support the higher pressure.
Consider a Low-Pressure Cut-Off model when loss of prime or low water supply is a realistic risk. Do not replace a traditional pressure switch with an Automatic Pump Controller unless the complete system is designed for it.
Frequently Asked Questions
Is 40/60 better than 30/50 PSI?
Not automatically. A 40/60 switch provides higher operating pressure, but the pump must reliably reach 60 PSI and every system component must be suitable for the higher pressure.
What should the pressure tank precharge be?
It is commonly set 2 PSI below the pressure switch cut-in. This means approximately 28 PSI for a 30/50 system and 38 PSI for a 40/60 system. Check it with the pump off and the tank fully drained to 0 PSI.
Why does my well pump run without stopping?
The contacts may be welded closed, or the system may be unable to reach cut-out pressure. Possible causes include pump wear, suction leaks, low water level, plumbing leakage, incorrect settings, or a faulty Foot Valve.
Can a clogged pressure port stop the switch from working?
Yes. Rust, mineral deposits, or debris can prevent system pressure from reaching the switch diaphragm. Disconnect power and pressure before inspecting the port or connecting nipple.
Can I adjust a pressure switch myself?
Adjustment affects both electrical operation and system pressure. Use the exact manufacturer procedure and an accurate gauge. If you are unfamiliar with pump wiring or pressure systems, hire a qualified technician.
Can an Automatic Pump Controller replace a mechanical pressure switch?
Not automatically. An Automatic Pump Controller may use both pressure and flow sensing and may be designed for a different pump and tank arrangement. Verify complete system compatibility before changing control types.