Best Check Valve Buying Guide (2026): How to Choose the Right Check Valve
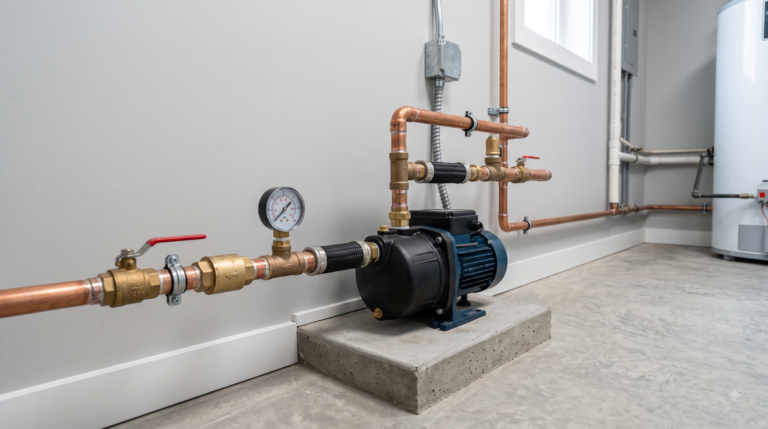
A check valve allows water to flow in one direction and helps stop it from flowing backward. It is commonly used to protect water pumps and plumbing equipment.
Choosing the right check valve requires more than matching the pipe size. The wrong type, material, or installation position can cause low flow, leakage, noise, or pump problems.
This guide explains the main check valve types, how to choose the correct model, and which buying mistakes to avoid.
At a Glance: Which Check Valve Do You Need?
The right check valve depends on where it will be installed. Use this table as a quick starting point.
| Application | Starting Point | Check First |
| Home water line | Spring check valve | Pressure and position |
| Pump suction line | Foot valve | Pump instructions |
| Sump-pump discharge | Sump check valve | Pipe size and debris |
| Large water line | Swing check valve | Flow and orientation |
| Potable cross-connection | Approved back flow device | Local code |
Quick Answer: For many residential water lines, a certified lead-free brass spring check valve is a practical starting point. Other systems may require a different valve.
Why You Can Trust ToollQ
ToollQ’s recommendations are based on more than 15 years of experience with plumbing and hardware products. We have helped customers deal with pump priming problems, damaged valve springs, worn seals, incorrect sizes, reversed flow direction, and valve noise.
We combine those real customer problems with manufacturer specifications and current drinking-water requirements. We do not assume that the most expensive valve—or one valve material—is best for every system.
Before You Buy a Check Valve
Answer these six questions before comparing brands or prices.
- What is the application? A water pump, sump pump, suction line, irrigation system, and home water line may need different valves.
- Is it for drinking water? Choose a valve with the required potable-water and lead-free certification.
- What connection do you need? Confirm the nominal size, pipe material, and connection type.
- What pressure and temperature will it handle? Check both the normal operating conditions and the valve’s maximum ratings.
- How will it be installed? Confirm the flow direction and whether the valve supports horizontal or vertical installation.
- Does local code require backflow protection? An ordinary check valve is not always a substitute for an approved backflow prevention device.
ToollQ Expert Advice
Do not buy from the product photo alone. Check the manufacturer’s specifications for size, connection, pressure rating, installation position, and certification.
How a Check Valve Works
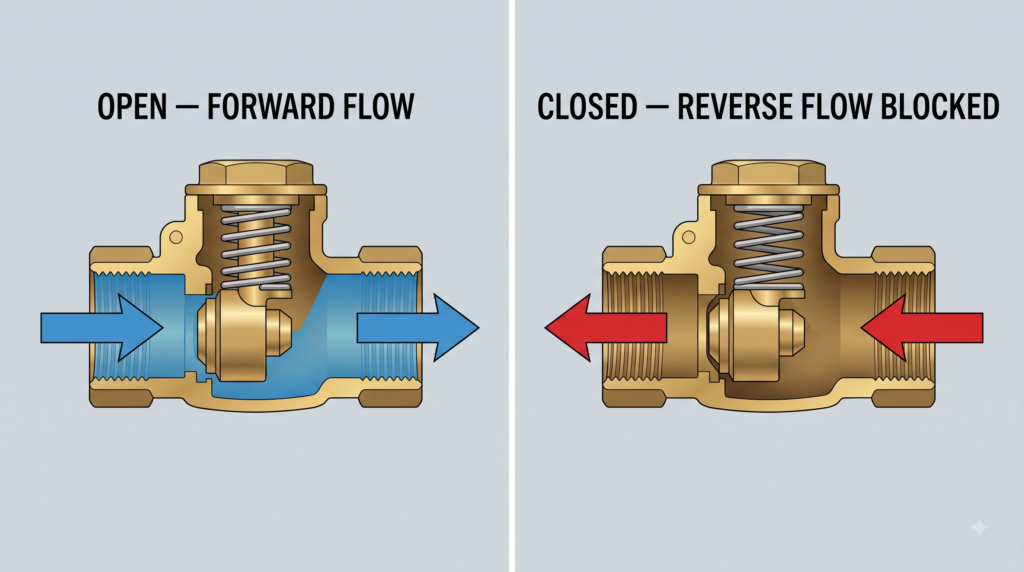
Forward water pressure pushes the valve’s disc, ball, or poppet away from its seat. When the flow stops or reverses, gravity, a spring, or reverse pressure closes the valve.
The minimum pressure needed to start opening the valve is called cracking pressure. If it is too high, a low-pressure system may have weak flow or fail to open the valve fully.
Every check valve also creates some pressure loss. Compare the manufacturer’s flow data instead of looking only at the valve size.
Check Valve vs Back flow Preventer
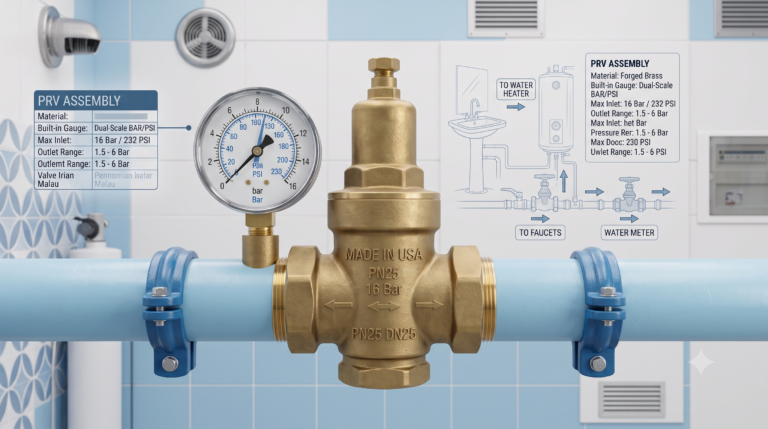
A check valve is one mechanical component that helps control reverse flow. A backflow preventer is an approved device or assembly designed for a specific contamination risk.
Some plumbing connections require certified and testable back flow protection. Follow local code instead of assuming that one ordinary check valve is enough.
Types of Check Valves
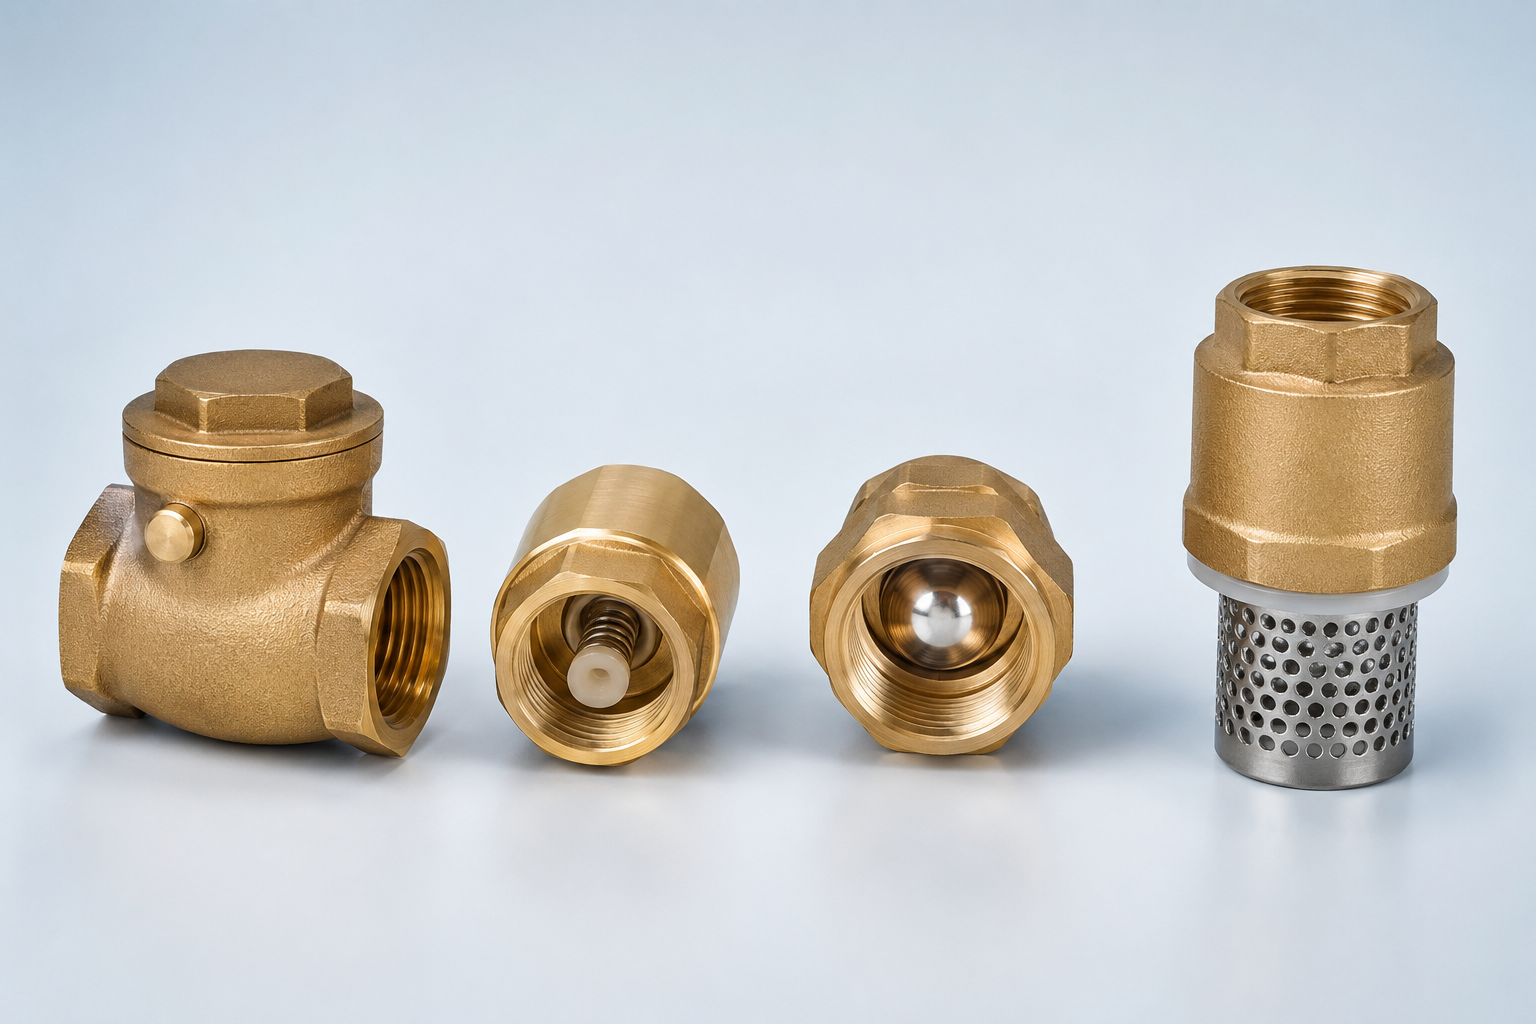
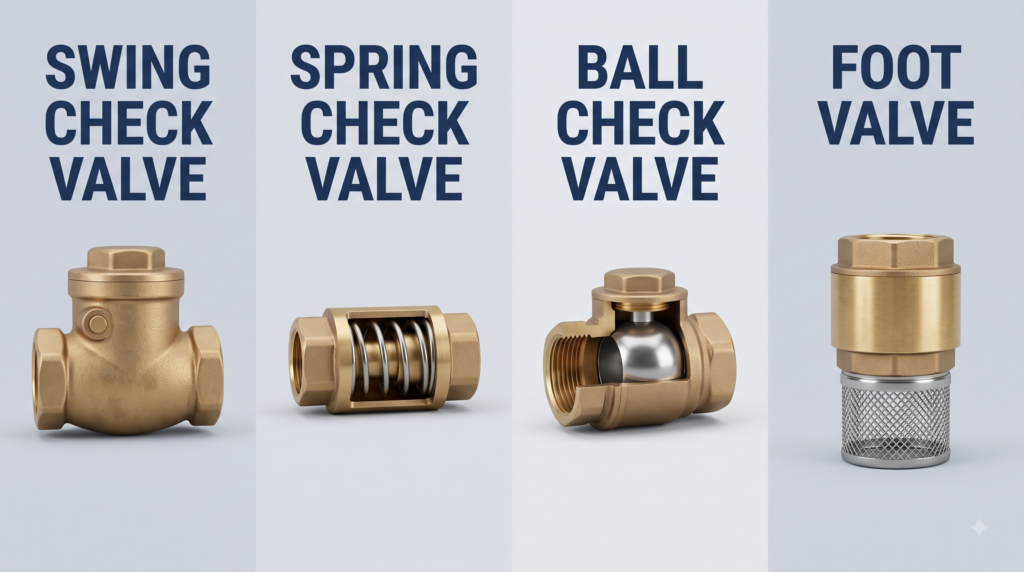
Each check valve design works differently. Choose the type according to the application, flow conditions, and installation position.
1. Swing Check Valve
A swing check valve uses a hinged disc that opens with forward flow. It works best where water flow is steady.
- Best for: Larger clean-water lines
- Advantage: Low resistance when fully open
- Watch out: Can slam when flow reverses quickly
2. Spring Check Valve
A spring check valve uses a spring-loaded disc or poppet. It closes quickly and works well in many residential systems.
- Best for: Home water lines and pump discharge
- Advantage: Fast and controlled closing
- Watch out: High cracking pressure can reduce flow
3. Ball Check Valve
A ball check valve uses a moving ball to open or close the flow path. Some models can handle water containing small amounts of debris.
- Best for: Sump, wastewater, or selected pump systems
- Advantage: Simple internal design
- Watch out: Installation position and flow rate matter
4. Foot Valve
A foot valve combines a check valve with a strainer. It is installed at the submerged end of a pump suction line to help the pump stay primed.
- Best for: Water-tank or well-pump suction lines
- Advantage: Helps retain water in the suction pipe
- Watch out: Debris and a blocked strainer can restrict flow
How to Choose the Right Check Valve
Start with the application, then check the valve’s material, size, pressure rating, and installation requirements. Do not choose by price or appearance alone.
1. Material
Lead-free brass is a practical choice for many residential water lines. Stainless steel or plastic may be better for corrosive environments, chemicals, or special applications.
For drinking water, verify the certification of the complete valve—not only the body material.
For U.S. drinking-water systems, review the EPA lead-free requirements and verify the exact model in a recognized certification listing.
EPA lead-free requirements
https://www.epa.gov/sdwa/use-lead-free-pipes-fittings-fixtures-solder-and-flux-drinking-water
recognized certification listing
https://www.nsf.org/certified-products-systems
2. Pipe Size
Matching the valve’s nominal size to the pipe is a common starting point, but it is not the complete sizing method. Also confirm the connection type and pressure drop at the expected flow rate.
3. Pressure Rating
The valve’s working-pressure rating must cover the system’s actual pressure. Also check the temperature rating and possible pressure surges.
4. Flow Direction
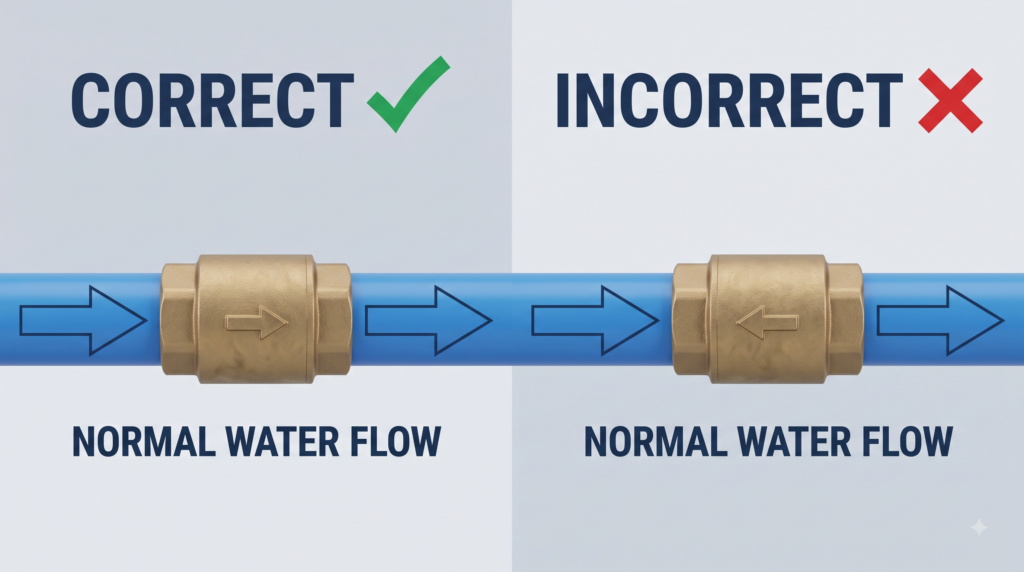
Every check valve has an arrow showing the correct flow direction. Installing it backward can block normal flow and prevent the system from working.
5. Installation Position
Some valves work horizontally and vertically, while others have strict mounting rules. Follow the instructions for the exact model.
6. Application
A home water line, pump suction pipe, sump-pump discharge, and irrigation system may require different valves. Choose the application first, then compare materials and prices.
Common Buying Mistakes
Avoid these common mistakes when choosing or installing a check valve.
- Choosing the wrong valve type: The valve may not suit the pump, flow, or application.
- Buying by pipe size alone: The valve may create too much pressure loss or fail to open fully.
- Ignoring cracking pressure: A low-pressure system may have weak flow.
- Installing against the arrow: The valve can block normal water flow.
- Assuming every valve works vertically: Some valves only work in approved positions.
- Ignoring potable-water certification: “Lead-free brass” alone does not confirm that the complete valve is certified.
- Using one check valve as required backflow protection: Local code may require an approved device or assembly.
- Buying the cheapest unknown model: Poor springs, seals, or machining can cause early failure.
Safety Note
Before removing a check valve, shut down the pump or water supply, release the pressure, and drain the pipe. Use a qualified professional for wells, water heaters, fire systems, or regulated back flow installations.
Hidden Regret Costs
The valve price is often the smallest part of the decision. A cheap or poorly matched valve can create much higher costs later.
- Repeat labor: Paying again to drain, disconnect, or cut the same pipe
- Pump wear: Loss of prime, short cycling, or repeated restarts
- Lower performance: Reduced water pressure and flow
- Noise and shock: Valve chatter, slamming, or water hammer
- Water damage: Leakage from a failed seal or connection
- Compliance costs: Replacing an uncertified or unapproved valve
Choosing the correct valve once is usually cheaper than repairing the same system twice.
Real Customer Experiences
These are common check valve problems we have encountered through years of working with plumbing and hardware products.
A Pump That Needed Re-Priming
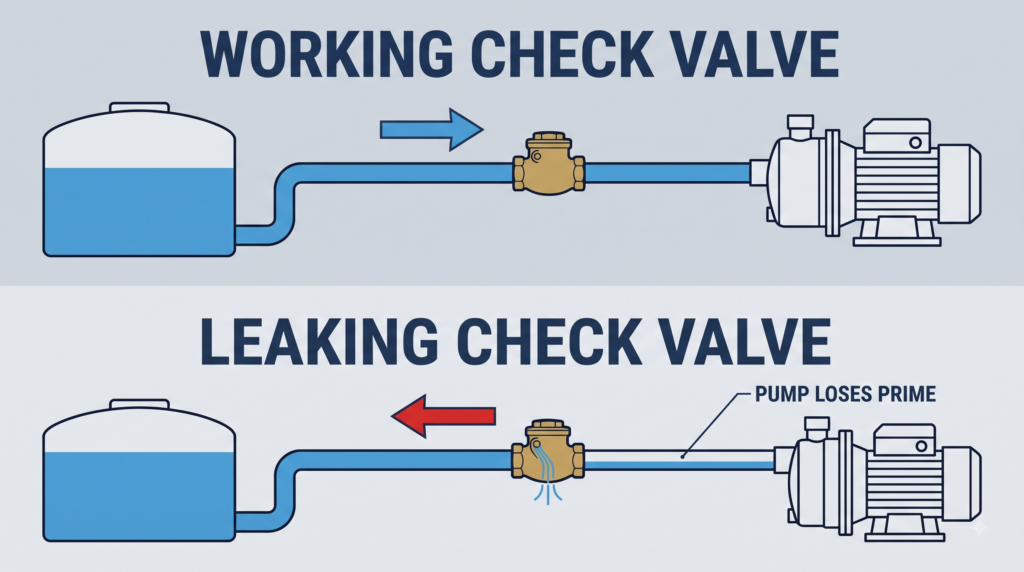
In one home, a water pump drew water from a storage tank through a suction pipe. The pump could not draw water after stopping unless it was filled and primed again.
Inspection showed that the old check valve was no longer sealing properly because its spring or internal seal had deteriorated. Water drained back toward the tank, causing the suction pipe to lose its water column.
A Spring Valve That No Longer Sealed
We have also seen spring check valves fail after the spring or sealing component became damaged. Replacing the valve without checking debris and water conditions may allow the problem to return.
The Wrong Size or Flow Direction
Some customers bought a valve that did not match the pipe connection or installed it against the flow arrow. Checking the existing markings, connection size, and flow direction can prevent both mistakes.
Valve Noise or Water Hammer
Customers have also reported rattling or a loud bang when a pump stopped. This can indicate unstable flow, the wrong valve type, or unsuitable closing behavior.
What These Cases Teach
Do not replace a check valve only because another model looks similar. First check why the old valve leaked, failed to open, or allowed water to flow backward.
ToollQ Pro Tips
- Take a photo before removal. Record the flow arrow, size, model, and installation position.
- Read the pump manual. It may specify the correct valve type and location.
- Check the flow data. Compare pressure loss at the flow rate your system needs.
- Consider a union connection. It can make future replacement easier.
- Support the pipe. Do not let the valve carry the weight or vibration of the piping.
- Watch for debris. Sand, scale, rust, or sealant can prevent the valve from closing.
- Test after installation. Check for leaks, normal flow, noise, and reverse drainage.
ToollQ’s Choice for Most Residential Water Lines
For a typical residential clean-water or booster-pump discharge line, ToollQ’s preferred starting point is a certified lead-free brass spring check valve.
Choose a model that clearly lists its cracking pressure, working pressure, temperature range, and approved installation positions.
This recommendation changes when the application changes:
- Choose a foot valve for a pump suction inlet.
- Choose a sump-rated valve for a sump-pump discharge.
- Consider a swing check valve for large lines with steady flow.
- Choose stainless steel or suitable plastic for corrosive conditions.
- Use an approved backflow device when required by local code.
Frequently Asked Questions
Does a check valve completely stop back flow?
A working check valve helps limit reverse flow, but wear or debris can cause leakage. It is not always an approved backflow prevention device.
Which check valve is best for home plumbing?
There is no single best type for every home. A certified brass spring check valve is a practical starting point for many residential water lines.
Can a check valve reduce water pressure?
Yes. Every check valve creates some pressure loss while water is flowing.
Can a check valve cause water hammer?
Yes. A valve that closes after reverse flow begins can create a loud slam or pressure surge.
Can a check valve be installed vertically?
Only if the exact model supports that position and flow direction. Always follow the manufacturer’s instructions.
How long does a check valve last?
There is no fixed lifespan. Water quality, debris, pressure, temperature, and operating frequency all affect service life.
Should a check valve be installed before or after a pump?
It depends on the pump design. A foot valve may be installed on the suction side, while another check valve may be used on the discharge side.
Can I install a check valve myself?
An experienced DIY homeowner may replace a simple, accessible valve. Use a qualified professional for wells, water heaters, regulated back flow systems, or uncertain installations.
Related ToollQ Plumbing Guides
A check valve controls flow direction automatically; it is not a manual shutoff valve. Read our Best Ball Valve Buying Guide (2026) to learn how to choose a service or isolation valve.
You can also read our Gate Valve vs Ball Valve guide to compare two common shutoff-valve designs.
Final Recommendation
The best check valve is the one that matches the application, flow rate, pressure, connection, installation position, and local requirements.
For many residential clean-water lines, a certified brass spring check valve is a practical starting point. Choose it using published specifications—not appearance or price alone.
ToollQ Final Check
Before buying, confirm:
- Application
- Connection size and type
- Expected flow
- Cracking pressure
- Pressure and temperature ratings
- Installation position
- Required certification